After the long wait my Intel i7 4790K has arrived which means I can finally start to build properly. Thanks to all the preparation I’ve done it’s a simple job to do a basic test on the stock coolers of the CPU and GPU.
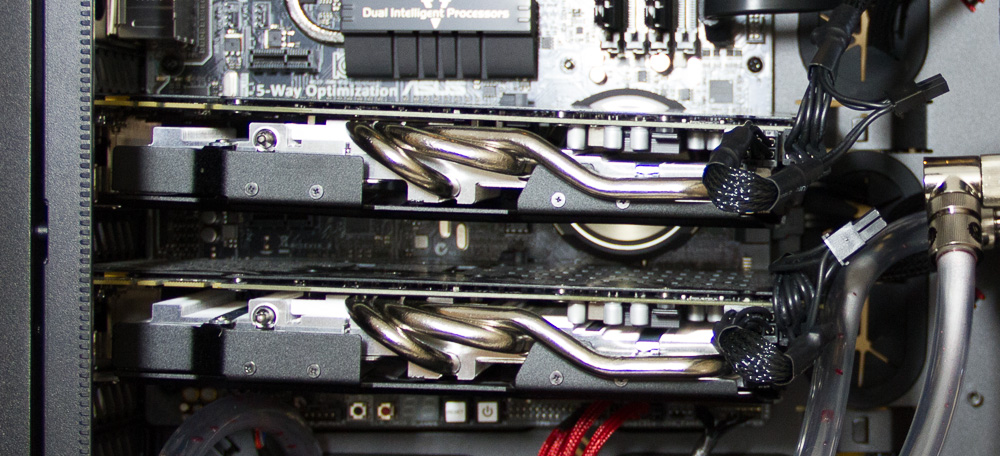
Plugging them all in was easy enough after having to reroute a GPU power cable which ended up being too short otherwise. The GTX 770’s don’t half bend in this configuration, and if I hadn’t been water cooling then it wouldn’t be acceptable. Still everything went together and booted straight away into my existing install of Windows 8.1 after two reboots and a lot of driver installation.
This boot was primarily to check that everything was happy on the new motherboard, so time for a stress test. Prime95 to stress the CPU and FurMark to stress the GPUs.
The 4790k runs hot on the stock cooler, seeing 95/98/98/95 on the four cores, on the GTX’s seeing 69/79 on the two GPUs. After a good 30-60 minutes of solid running like this I decided it was likely good enough, I’ve seen some things saying that 6+ hours is reasonable to assume everything is good in the over clocking world.
It was time to start the proper water cooling, so out came the GPUs and I cleaned up the CPU again to remove the stock Intel thermal compound. Mounting the EK Supremacy CSQ is easy enough once you realise which parts you’ll need. A few weeks ago I’d opened it up to change the heat spreader plate to the one which was designed for the 1150 socket, getting that gasket back in was a royal pain in the butt.
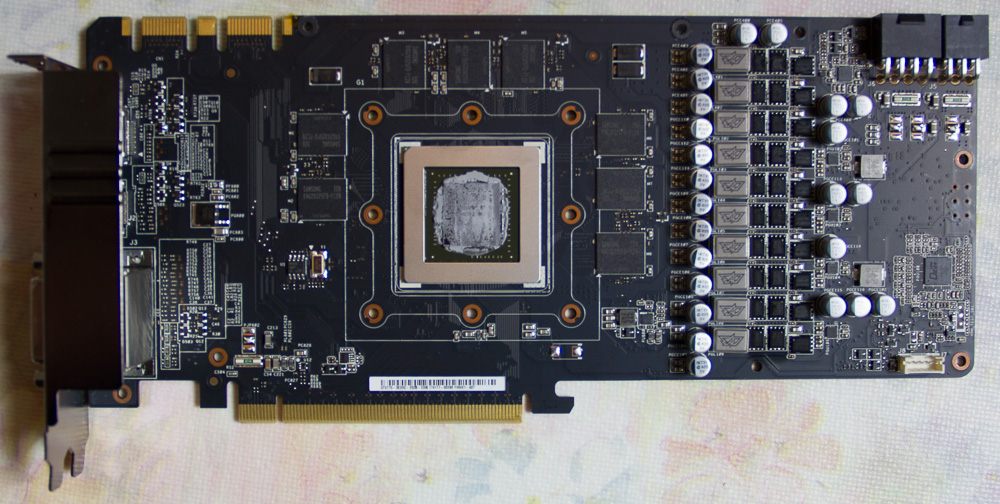
Then it came to removing the stock coolers from the GTX 770’s, this was the thing I had been most nervous about, it turns out it was simple enough (removing the fan connector first, which wasn’t documented on the EK-FC770 instructions). An additional note is to remove the sticky washers that were used on the rear GFX card, they concealed parts of the screw holes and you’re provided proper washers to replace them.
Cleaning the thermal compound out from between the capacitors/resistors on the top of the die required care. Once clean it was a case of applying the GPU thermal compound, memory thermal pads and thermal compound/pads on top of the phase regulators.
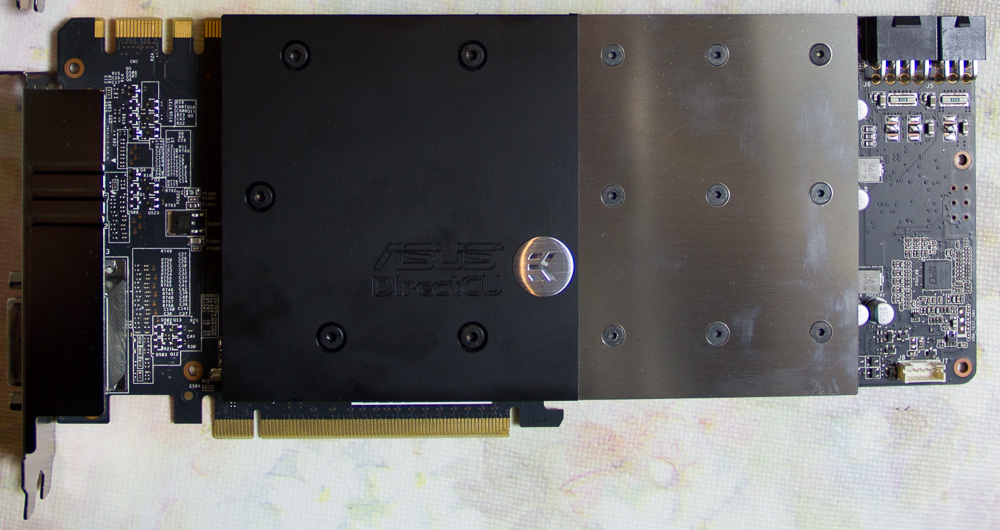
Afterwards it was a case of carefully lining up the new water block and placing upon the circuit board it needed turning over to screw it down, using the edge of a table or the water block box helps the overhand from the dual PCIe slot brackets stay out of the way.
Additionally I had to remove the input/output block from each water cooler block as I’d be using a bridge block. After doing this to both GPUs putting them in seemed far easier then with their normal cooler, they also seemed to bend less given the weight of the block was far closer to the PCIe socket.
Finally a fun exercise with tubing, it was only as I got towards the end of piping I got the nack of using the compression glands, warm the tube up, handle it a bit and just dip into the cooling liquid to act as lube. It slips on easier, but still secure and then the screw down compression makes sure it’ll be safe.
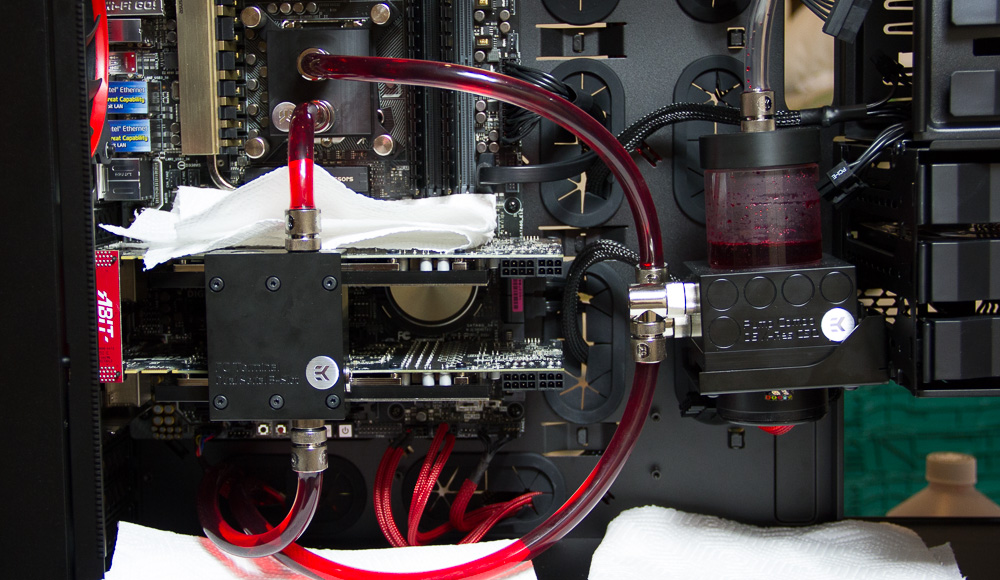
So it’s crunch time, filling the loop now takes about 900ml, ran the pump for an hour or so, no leaks, all looking good. Time to boot, one CPU and two GPUs still recognised, score… nothing fundamentally broken!
Time to repeat the heat loading test, stick the pump on medium and fans on full, running up Prime95 and FurMark. Now these are much better results 64/65/66/63 on the four cores and 52/55 on the two GPUs.
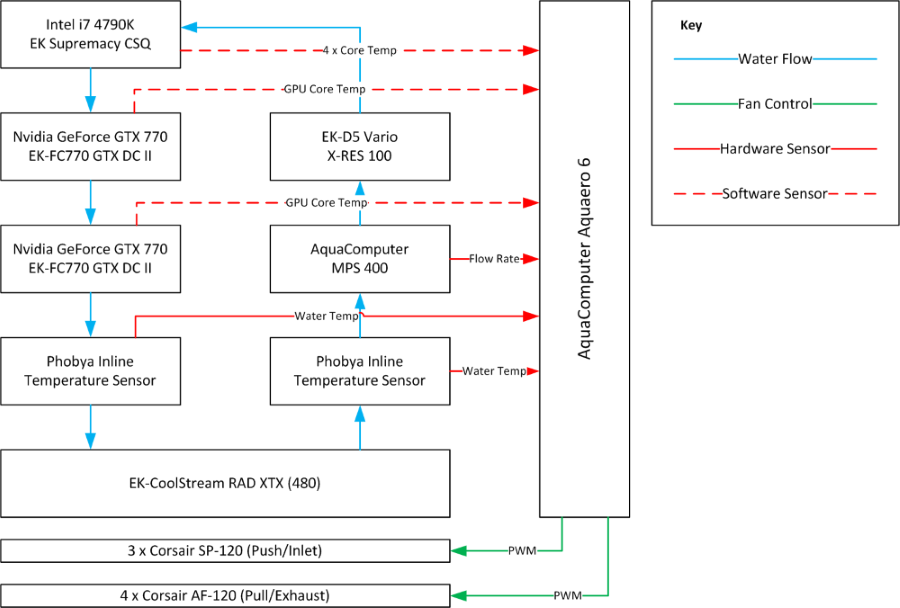
The above diagram shows my final build in a block form, the Aquaero 6 is awesome it just needs configuring…